Preview Pages

Showing posts with label Greek. Show all posts

Wednesday, February 29, 2012

Good Old Fashion Spanakopita


I don’t know about you, but I love vegetables. Cauliflower, carrots, asparagus, snap peas (YES!) broccoli, peppers, lettuce and so on. But I especially love spinach and my absolute favorite dish with spinach is definitely spanakopita, AKA spinach pie. Usually, this is made with filo dough, but in the villages and the older towns in Greece, the villagers don’t have filo dough. So what do they do? They make their own. Of course it’s not nearly as thin, but I sometimes prefer the homemade dough. If you’ve never had this, and you like spinach – I would definitely suggest making this recipe. Even if you don’t like spinach, you will change your mind after trying this. Spinach with lots of feta cheese, onions and herbs, tastes so much different than plain bland spinach.


Ingredients:
For the dough: (you can use really any dough you want, I used whole wheat dough)
2 cups whole wheat flour
3 cups white flour
2 cups water
1 T olive oil
About 1 T butter
1 T vinegar
1 tsp. salt 

 
For the filling:
2 cups cooked and drained spinach
2 small onions, or 1 medium onion, diced
A few green onions, diced
¼ cup fresh dill, chopped
¼ cup fresh parsley, chopped
12 oz feta cheese
1-2 T soft goat cheese
1 egg
Salt and pepper to taste

Procedure: Preheat oven to 375 F. Make the dough, adding as little or as much flour and water as needed. Let the dough sit in the bowl and begin to prepare the rest of the ingredients. 


Place the raw spinach in a pot and let it cook until it has shrunken down in size and liquid is beginning to come out. 


Don’t cook it completely because it will be cooking more in the oven. Once it is at that stage, pour it into a colander and squeeze all excess liquid out. This is a very important part of the recipe, because if the spinach is wet at all, the pita will become soggy and disgusting. Once you think all of the liquid is out leave in the colander on the side, so that any extra liquid will continue to come out. 


In another pan, pour the oil and fry the onions until they are tender but not caramelized. 

 
Similar to the spinach, the onions will cook more in the oven, so we don’t want melted onions in the pita. Add the chopped parsley and dill to the pot and let them cook for about a minute or so.
In another small pan, melt the butter.
While the butter is melting and the onions and fresh herbs are cooking, take the feta cheese, goat cheese, and the egg and mix it all together in a bowl. 


Once it is all combined remove the pan from the burner and add the cheese mixture to the onions and herbs in the pan. Now add the cooked, strained spinach and mix everything together.


Now that the filling is done start with the dough. Butter a dish. Take the dough and cut it in half, then cut it in half again so that you have 4 equal pieces. Roll out the dough as thin as you can and place it in the dish covering all of the dish. 


Cut any excess off. Butter the dough and then roll out another piece of dough. Place that one on top of the first one and pat it down flat. (I found a recipe that mentioned that double layering the dough should make the bread fluffier and thicker, which is more of the old style so I wanted to try it. In order for this to work, each layer must be thin, so this is an optional step) Now butter it again and pour the spinach mixture into the center. 


Spread it out evenly and roll out the third piece of dough. Do the same as before, butter and add the fourth piece on top. 


Lightly slice the top layer of dough into pieces 12 pieces. Instead of using the melted butter on top, take raw butter and ‘smear’ it all over the top of the dough. 


This will make a crispier crust so I would recommend doing it. Now place it in the oven for about 40-45 minutes, or until the top is brown is no longer doughy.  


Let it cool a bit and then it is ready to serve! 


Sunday, February 19, 2012

Leg of Lamb – My version of a gyro


Whenever I go to Greece and Cyprus I always have to have some souvla (meat on the grill) and/or a gyro. I just have to, it’s a tradition. And it just so happens, that my pappou (grandpa) makes the best souvla I have ever had. So, in honor of Greece and my pappou, I decided that I have to make a dish with a leg of lamb with a pita. And of course I will make it Greek style, true Greek style. All Greeks have lamb, and if you aren’t really sure if you like lamb, I would highly recommend trying this dish and then deciding whether you like it or not. I am sure that you will change your mind. 

Pretty much everyone I know likes gyro. After all, it’s meat in a pita with yogurt and tomatoes and lettuce. Really simple and absolutely delicious. Of course, the best gyro is in Greece, but since I don’t live there, I have to improvise. 

Just a side not, gyro is pronounce (yee-ro NOT jy-ro). Where did this ‘jyro’ come from, there’s no ‘J’ in the Greek alphabet! Please, please say it correctly, you have no idea how much it annoys me when people say, “I’m gonna go get a JY-RO from that Greek restaurant.” No. Now you know.

What you will need for this recipe:
1 leg of lamb
3 T olive oil
1 tsp. dry oregano
1 tsp. rosemary
3-4 sprigs fresh oregano (optional, if you don’t have this you can just use a little more dried oregano)
1 lemon
5-6 cloves garlic
Salt and pepper to taste

 
Procedure: As you can see, this is a very simple dish, with few ingredients. Despite the simplicity of the recipe, this is the traditional way to cook lamb in Greece, and it is, I believe, the best way to cook lamb. You can use whatever herbs you like, I used rosemary and oregano, but you can use other herbs also – make it your own.

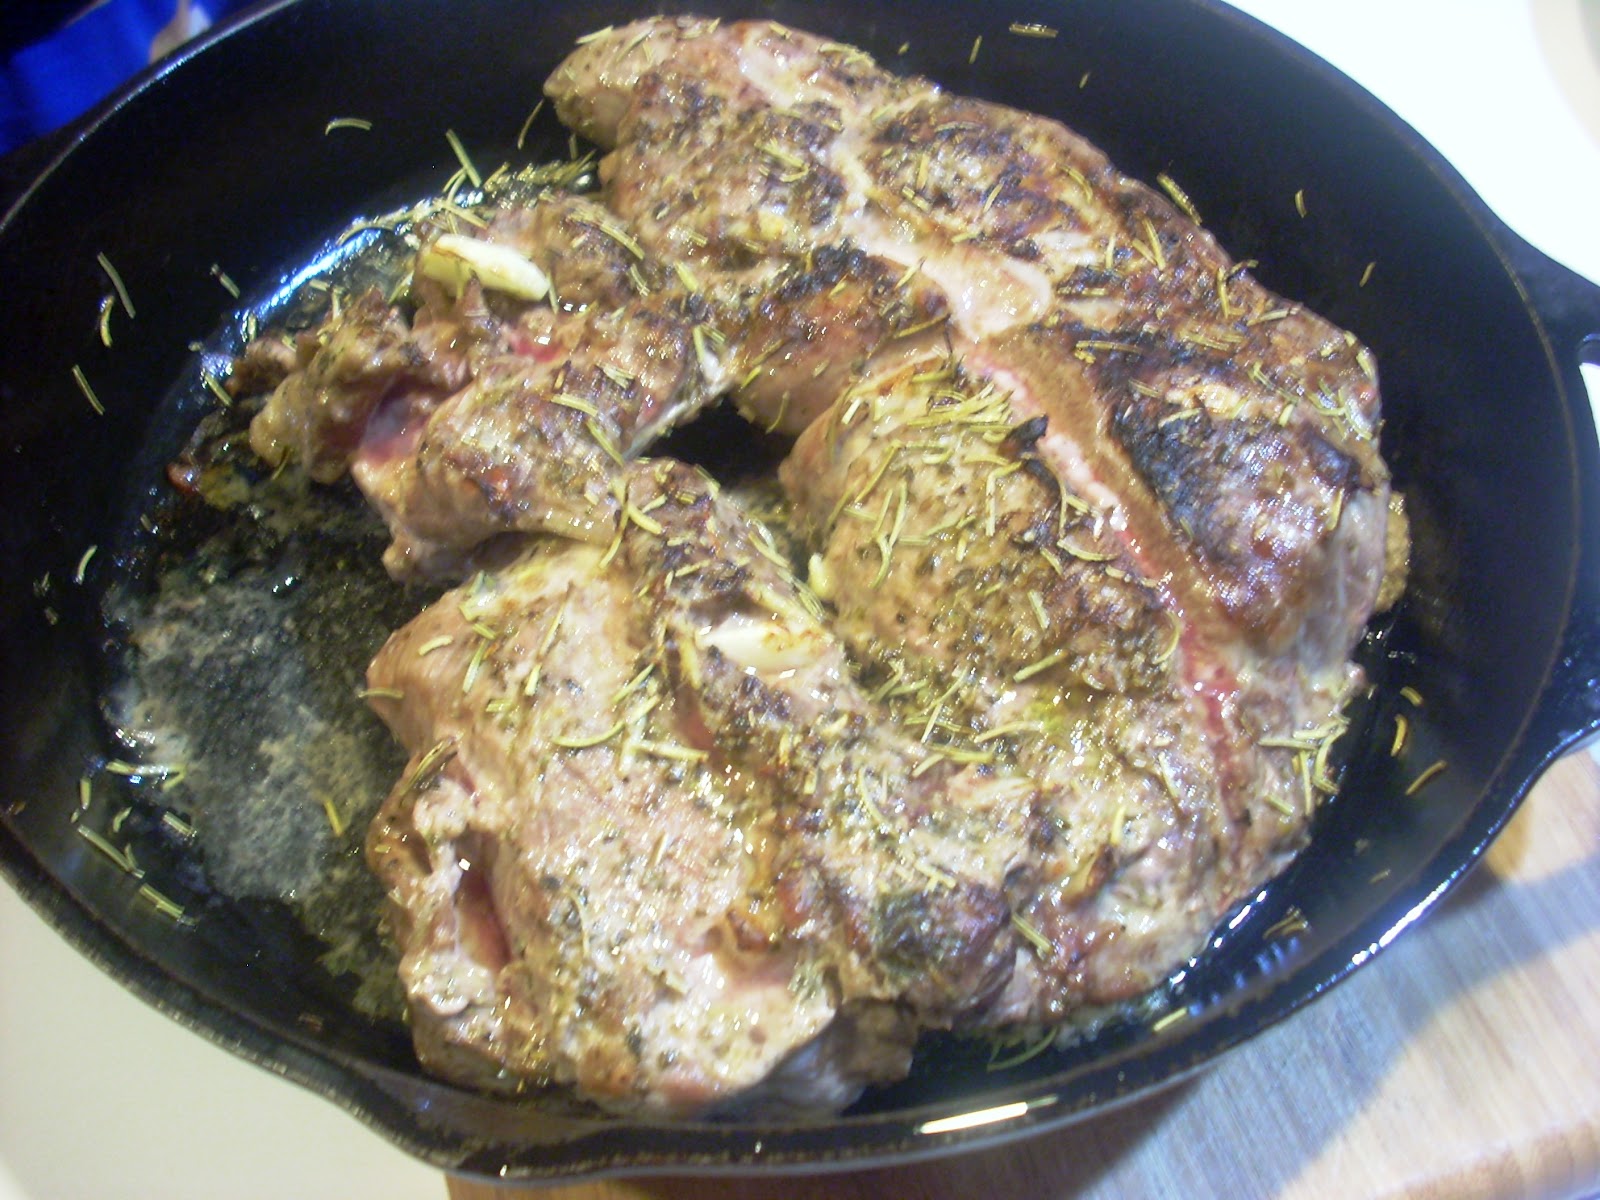
First, take the leg of lamb and make slits randomly throughout. Then, place the cloves of garlic (whole) into the slits. Cover it with olive oil and the oregano and rosemary. Once that is all incorporated, (rubbed in – use your hands) sprinkle the salt and freshly ground pepper over top. 


Place the leg of lamb under the broil, constantly turning from one side to the other to brown it until it is done. The time depends on how well cooked you want it, medium rare, or well done. Check on it until you think it is done for your taste. of course, it always tastes better on the grill, so if that is an option, I would definitely suggest doing that. That's the way it is cooked commonly in Greece, and it tastes even better that way. All in all, everything tastes better on the grill.


At the end, squeeze the lemon juice all over the top of the lamb and slice. Now it’s time for the pita wrap – my version of the gyro. 


In my gyro wrap I put tomatoes, Greek yogurt, some feta, lettuce, and a sort of pesto. 


For the pesto, I just use, chopped parsley, oregano, lemon juice, 1-2 cloves of garlic, and salt and pepper. Again, I don’t have precise amounts of these ingredients because it’s just a little of this, and a little of that. Put all of that together in the food processor and add more lemon and salt to taste. 


Put some of the sliced lamb in a pita, with a few spoons of good Greek yogurt (I use Fage – pronounced Fa-yeh), a few spoons of the pesto sauce, some sliced grape tomatoes and some chopped lettuce. 


Simply delightful. I hope you try this dish and tell me how you like it! And remember, gyro is pronounced yee-ro, not jy-ro! :-)   

Friday, February 10, 2012

Holiday Cookies #3: Melomakarona – Greek Honey Spice cookies

I just noticed that I never finished my holiday cookies recipes! I have one more recipe left – melomakarona. I realize that the holidays are long gone, sadly; however, it’s never too late to share one more recipe with you. This is a more complicated recipe than the other ‘simple cookies,’ but I still love it – maybe even the most out of the three. Melomakarona, also known as Finikia, are spice cookies dipped in syrup and served with crumbled walnuts on top. They are to die for! Though these are commonly made during the holiday season, I have eaten them at many other times of the year. So you can still try this now!


What you will need:
 2 sticks butter
1 cup oil
1 cup sugar
1 tsp. cinnamon
¼ tsp. cloves
1 cup fresh orange juice
2 tsp. baking powder
1 tsp. baking soda
1 jigger brandy
6 ½ to 7 cups flour


For the syrup:
2 cups water
2 cups sugar
½ lemon
½ cup honey
1 tsp. cinnamon 


Procedure:
Preheat oven to 350° F. Beat the oil,sugar, and butter. Slowly add the rest of the ingredients; add flour, one cup at a time, until the dough is soft and does not stick to hands. 

 
Shape the dough into ovals and bake on greased cookie sheets for 15 to 25 minutes (until golden). 


 (^^^ I poke holes in the cookies with a fork, so that when we dip them in the syrup, they can absorb it better - I would suggest doing this)


Take the cookies out and let them cool on a cookie tray. Once they are completely cool, begin to make the syrup (you can also make the syrup ahead of time and bring it to a boil after you make the cookies). First, make a simple syrup with the water, sugar, cinnamon, and lemon; boil for 10 minutes. Turn off the heat and add the honey. Now, dip the cookies in the hot syrup for a few seconds (the longer you leave them in, the sweeter and softer they get). 

 
After absorbing the syrup, sprinkle crushed walnuts over top. 


Done! Hope you enjoy these yummy sticky cookies! Try them out and tell me what you think.

Sunday, January 29, 2012

Zucchini Fritters: Kolokithokeftedes

Why do Greek dishes have such long names? Kolokithokeftedes, that’s insane. Nevertheless, Greeks really can cook – enough said. A week ago, I was looking for a new recipe to cook for this blog and I started typing in different searches into Google. I love watching Barefoot Contessa, so I decided to do a Google search. I clicked on a blog all about these things called zucchini fritters, it was called, "Cooking from the Farms: Zucchini Cook Off" at: http://authorjaneward.wordpress.com/2010/08/12/cooking-from-the-farms-zucchini-cook-off/. They sounded delicious and I had never had them so I started reading. It was very interesting and the pictures were mouthwatering. But, that was not what caught my attention. The author, Jane Ward, mentioned near the beginning, that she received her August/September copy of Saveur magazine and it was “The Greek Issue,” which included many delicious recipes. It was there that she read about zucchini fritters, after having also seen them on a Barefoot Contessa episode. Yet, she said, that the magazine called the recipe “Kolokithokeftedes” which is Greek for zucchini fritters. When I heard that word, or rather read it, it sparked a memory. I suddenly realized that I have had zucchini fritters before, in fact they are one of my favorite foods.

The first time I had this dish, was at my yiayia’s (grandma’s) house in Cyprus, with my cousins Savva and George and my brother Greg. For some reason, and I’m not exactly sure why, but this memory is much more vivid than others near that time. I remember, very clearly, playing a “Crash” game on the PlayStation 2 or 1, actually, being more of a spectator than an actual player. I had been recording our conversations with my mp3 player just for fun. I even remember the level we were playing - Crash (the character, he’s a fox) was on a tropical island collecting diamonds and playing with the tiki statues. I can’t believe I’m talking about a video game on a food blog but it all ties in - keep reading. How do I remember all of this, I have no idea. It was a fun game, but we had been playing all afternoon, and it was almost dinner time. I started to smell something really yummy coming from across the hall in the kitchen. My mom and yiayia came over with plates of these fried patties. Now, fried food tastes good, no matter what it is, but these were something I wasn’t expecting. They were sizzling hot, but they smelled so good and I was so hungry that I dug into one. It was absolutely scrumptious! It turned out that my grandma took zucchini from her garden and shredded it, adding fresh dill, breadcrumbs and an egg. I had at least four of those that night, and they weren’t exactly small. Who would have known that fried zucchini tasted so good? I absolutely loved the Kolokithokeftedes and this memory makes me all the more eager to try this recipe. The last time I had these was probably around that time, so I felt the need to make these again.


On the food blog I found, there was a recipe, but I continued to search to see what other recipes I could find. It turns out that they’re all pretty much the same, so I chose one and bought the ingredients.

Ingredients:
2 eggs
3 medium zucchini
1 teaspoon salt
¼ cup chopped dill
¼ cup chopped parsley
4 green onions, finely chopped
2 teaspoons minced garlic
Zest and juice of one lemon
Freshly ground pepper black pepper
½ lb feta cheese, crumbled
2 Tablespoons breadcrumbs
2 Tablespoons flour

Procedure:
Grate the zucchini, sprinkle salt on top and let it sit for 10-15 minutes in colander or strainer so that it can lose the water. Squeeze excess water out and place into a bowl. Add the eggs, dill, parsley, onions and garlic and mix. Then add the flour/breadcrumb mixture until thick. Add the crumbled feta and mix well.
 
Heat some oil in a pan for the frying. (I didn’t fry mine, I pan fried, these fritters can be cooked either way, but I would probably recommend frying because they do taste better and have a better texture). Make small round balls of the zucchini fritter mixture and place in pan. Cook on each side until brown and crisp, yet moist on the inside.

On the side I like to serve these with a tzatziki sauce, a Greek yogurt sauce. Any normal tzatziki sauce works fine. I used Fage yogurt (pronounced Fah-yeh!) with chopped dill, garlic, olive oil, salt, and finely diced cucumber. It’s a cool and refreshing dip that perfectly complements these delicious fritters. I hope you enjoy this recipe!

Sunday, January 1, 2012

Holiday Cookies 2: Kourambiedes - Wedding Cookies

I can’t tell you how much I love these cookies because every time I make them, I can't stop eating.  These are called Kourambiedes, or more commonly in English, Wedding Cookies. Every year I have these and share them with friends around the holiday season. I remember ever since I was a kid, whenever my mom would invite friends over, I would wake up to the smell of her homemade cooking. One of my favorites are her kourambiedes, which are delicate bite-size butter cookies heavily coated in powder sugar. When you bite into one, it melts in your mouth. It has a crunch from the almond, and is sweet and moist from the powdered sugar. If you have a sweet tooth, you definitely need to try this recipe.


Ingredients:
1 lb or 4 sticks unsalted butter
1 cup toasted sliced almonds (optional)
2 eggs
1 tsp vanilla or 1 tsp almond extract
5-6 cups of flour and 1 tsp baking powder
¼ cup of powdered sugar
1 jigger brandy
*Extra powdered sugar about 1 lb to sift on top of cookies*


Procedure:
Preheat oven to 350°F. Mix the butter and sugar together until creamy. 


Add eggs, brandy, vanilla/almond extract and slowly add flour until it makes a soft dough. Add sliced almonds. 


Shape into small (bite size) balls and bake for about 20 minutes. 


When cookies are removed from oven, place directly on powdered sugar and sift some extra on top. 


Let them sit until cool, and then eat!  

Saturday, December 31, 2011

Holiday Cookies 1: Koulourakia – Greek Butter Cookies

Every year around the holidays, my family and I get into the festive mood by baking sweets and cookies. Not only is it fun to bake, but it’s also the perfect addition to a gift basket or a thank you card during the holiday season. We always bake some just to have in the house, so that, like my mom always says, we can invite people over for coffee without having to worry about what to serve them. If you’ve ever had dinner with a Greek family, you know exactly what I mean. Whenever we have anyone over, my mom practically cooks a feast and we end up having leftovers for days. This year, we did exactly that. We made many holiday foods and desserts some of which include: koulourakia, kourambiedes, melomakarona, baklava, chocolate truffles, and some cinnamon sugar cookies! Whenever I hear these words, I immediately think of Christmas, the holidays, and the house filled with mouthwatering aromas. I think of my family and I sitting by the fireplace drinking hot tea and sharing wonderful stories. Every year these cookies bring back so many memories that I decided I had to share them with you. 

First on my list, were the koulourakia. This is a basic butter cookie, but I make it extra special with my cookie press. I made different shapes with different fillings and toppings. These are so easy and so much fun to make, and yet I managed to waste 3 hours trying to make the shapes perfect and to get the cookies to look beautiful. 


Ingredients:
1 lb or 4 sticks butter (Kerrygold butter works best)
The zest of one orange and lemon
2 tsp baking powder and a pinch of baking soda
4 eggs
6-7 cups of flour (This always depends. It seems like every year we make these, we use a different amount of flour. Just make sure the dough is soft enough that you can roll in your hands and put into the cookie press without having it stick to the sides)  
1 tsp vanilla
2 cups sugar


Procedure:
Preheat oven to 350°F.
Beat the butter and sugar together for a few minutes until creamy.


Add eggs, vanilla, and zest. Slowly add the flour, trying not to beat it too much (the more you beat it together the harder the cookies will become). Once all of the ingredients are incorporated well, take the dough out and place it on the counter you are working on. 


Begin to take small portions of it and roll them in your hands, big enough to fit into the metal tube of the cookie press. Then pick the shape of the cookie you want, and fasten together the cookie press.


This time, I tried a few different cookies and put many different toppings on them. I really like to try different things so I used: raspberry marmalade, chocolate chips, sliced almonds, toasted coconut shavings, nutella, and brown sugar. You can also use different colored sprinkles to make them more festive.
Press the cookies out onto a cookie sheet and put in the oven for about 15 minutes. Again, this depends on how big the shapes are and what color you want them to be. I usually want them to get a light brown color, which means a little more time. The most important thing is to check on the cookies every so often just to make sure they don’t burn. 


After that, it’s time to eat! These cookies are perfect for any occasion, and most importantly they taste delicious. Merry Christmas and Happy New Year!