Preview Pages

Wednesday, February 29, 2012

Creamy Scrumptious Galaktopoureko

I think it’s time to share my favorite dessert with you. It’s my last blog post (sniffle, sniffle), and I have to make it extra special. I have to admit, I don’t know what my favorite food is – I love everything! But when it comes to desserts, without doubt my favorite dessert is galaktopoureko. Crazy name – yes. Delicious – absolutely positively yes. Galaktopoureko is a creamy custard dessert with sweet syrup, crispy filo dough and just a hint of vanilla and cinnamon. It is simple and delicious. Who doesn’t love a luscious custard dessert? 

Every year I work at my church’s Greek Food Festival which takes place just after school’s done. I usually work in the food line preparing the trays and giving out utensils and such. Probably sounds boring, but it isn’t. We have the best, and I mean the best food and I try to eat something different each time. Yet, every year I just have to have galaktopoureko. I can’t leave without having it at least once. At my church they make the galaktopoureko with a lot of cream filling and a thick dusting of powdered sugar on top. When you bite into it, it’s like biting into cool refreshing sweet pudding with crunchy crisp filo dough. But the more traditional way of making it is using syrup instead of powdered sugar.

I’ve always wanted to make this but honestly I never knew where to start. It all seems so difficult to me. You have to make custard. Then you have to prepare the filo dough, which is always tearing apart and never comes out as one piece, never. And then, as if that wasn’t enough, you have to make syrup to pour on top as soon as you take the galaktopoureko out of the oven. (Gasp) In my mind, that is insane. But I wanted to make this so badly that I overcame my fear and looked up a recipe. And honestly, it is so much easier than I expected! I just can’t stop eating it.


Ingredients (I used the recipe from Vefa’s kitchen):  
For the custard filling:
4 cups milk
3 eggs
2 yolks
½ cup sugar
1/3 plus 1 T cream of wheat/semolina
1 tsp. vanilla
 
For the crust:
1 box filo dough
1 stick melted butter

For the syrup:
1 ½ cups sugar
1 cup water
1 T lemon juice
1 tsp vanilla extract

Procedure: Preheat oven to 375 F. Pour the milk into a pan, and warm it up. 


While this is heating up, in another small pan, melt some butter which will be used later. 


In a mixer, pour the eggs (the yolks too) with the sugar and beat together until it gets frothy. 


Take the milk off of the heat and pour the eggs-sugar mixture. At the beginning, add one spoon at a time, constantly beating until you have added all of the mixture to the milk. Continue to beat together. Now put the vanilla and semolina in and mix until it has thickened. This is a basic custard, similar to a béchamel or pudding. 

Set the custard aside. Butter a dish and take the filo dough out of the package. Now take one sheet of the super thin dough and lay it flat in the dish. Brush on some of the melted butter on top of the sheet, and then take another sheet and lay that on top. 


Do this same process for around another 15 sheets. After that last sheet, pour the custard into the dish.


Spread it out evenly and take another sheet. This is the hard part. Lightly apply butter onto the filo without tearing it. It’s ok if it tears a bit, because there will be more filo dough on top of it, but try not to rip the whole sheet. Continue to put the butter on top of the sheets for about another 10 or so sheets. 


Once you reach the end, butter the last sheet and carefully with a sharp knife, slice the sheets. Try to cut through only a few of the top layers, without reaching the actual custard. 


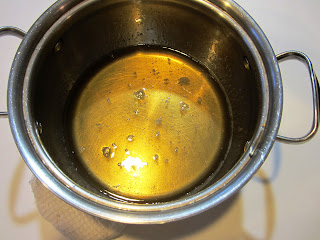
Now place this in the oven for about 40-45 minutes or until light brown. While the galaktopoureko is baking, pour the water and sugar into a pot for the syrup. Let them boil for about 7 minutes and then add the lemon juice and vanilla at the end. 


Take out the galaktopoureko once it has browned, and pour the warm syrup all over the top. 


Then let it sit for at least an hour or so until the syrup has been absorbed. Then cut and serve warm. 


I think it tastes better warm but it also tastes good cold, so if you don’t finish it all the day you make it, put it in the fridge, uncovered, and eat the next day. It is very important to leave it uncovered, so that the filo dough will not get soggy and moist. Most people serve with cinnamon so I decided I would try it and see which tastes better. And I like it even better with a bit of cinnamon over top. It tastes absolutely delicious and I really hope you try it! Tell me how you like it! :) 


Good Old Fashion Spanakopita


I don’t know about you, but I love vegetables. Cauliflower, carrots, asparagus, snap peas (YES!) broccoli, peppers, lettuce and so on. But I especially love spinach and my absolute favorite dish with spinach is definitely spanakopita, AKA spinach pie. Usually, this is made with filo dough, but in the villages and the older towns in Greece, the villagers don’t have filo dough. So what do they do? They make their own. Of course it’s not nearly as thin, but I sometimes prefer the homemade dough. If you’ve never had this, and you like spinach – I would definitely suggest making this recipe. Even if you don’t like spinach, you will change your mind after trying this. Spinach with lots of feta cheese, onions and herbs, tastes so much different than plain bland spinach.


Ingredients:
For the dough: (you can use really any dough you want, I used whole wheat dough)
2 cups whole wheat flour
3 cups white flour
2 cups water
1 T olive oil
About 1 T butter
1 T vinegar
1 tsp. salt 

 
For the filling:
2 cups cooked and drained spinach
2 small onions, or 1 medium onion, diced
A few green onions, diced
¼ cup fresh dill, chopped
¼ cup fresh parsley, chopped
12 oz feta cheese
1-2 T soft goat cheese
1 egg
Salt and pepper to taste

Procedure: Preheat oven to 375 F. Make the dough, adding as little or as much flour and water as needed. Let the dough sit in the bowl and begin to prepare the rest of the ingredients. 


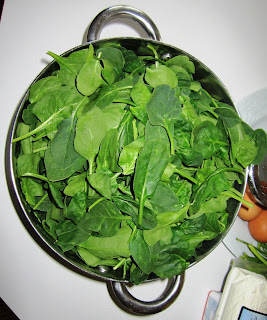
Place the raw spinach in a pot and let it cook until it has shrunken down in size and liquid is beginning to come out. 


Don’t cook it completely because it will be cooking more in the oven. Once it is at that stage, pour it into a colander and squeeze all excess liquid out. This is a very important part of the recipe, because if the spinach is wet at all, the pita will become soggy and disgusting. Once you think all of the liquid is out leave in the colander on the side, so that any extra liquid will continue to come out. 


In another pan, pour the oil and fry the onions until they are tender but not caramelized. 

 
Similar to the spinach, the onions will cook more in the oven, so we don’t want melted onions in the pita. Add the chopped parsley and dill to the pot and let them cook for about a minute or so.
In another small pan, melt the butter.
While the butter is melting and the onions and fresh herbs are cooking, take the feta cheese, goat cheese, and the egg and mix it all together in a bowl. 


Once it is all combined remove the pan from the burner and add the cheese mixture to the onions and herbs in the pan. Now add the cooked, strained spinach and mix everything together.


Now that the filling is done start with the dough. Butter a dish. Take the dough and cut it in half, then cut it in half again so that you have 4 equal pieces. Roll out the dough as thin as you can and place it in the dish covering all of the dish. 


Cut any excess off. Butter the dough and then roll out another piece of dough. Place that one on top of the first one and pat it down flat. (I found a recipe that mentioned that double layering the dough should make the bread fluffier and thicker, which is more of the old style so I wanted to try it. In order for this to work, each layer must be thin, so this is an optional step) Now butter it again and pour the spinach mixture into the center. 


Spread it out evenly and roll out the third piece of dough. Do the same as before, butter and add the fourth piece on top. 


Lightly slice the top layer of dough into pieces 12 pieces. Instead of using the melted butter on top, take raw butter and ‘smear’ it all over the top of the dough. 


This will make a crispier crust so I would recommend doing it. Now place it in the oven for about 40-45 minutes, or until the top is brown is no longer doughy.  


Let it cool a bit and then it is ready to serve! 


Tuesday, February 21, 2012

A Two in One Post: Sugar Snap Peas, Anyone?

I am absolutely obsessed with sugar snap peas. They are bright green, crunchy sweet and absolutely delicious pea pods that can be cooked in various ways. The first time I had them was this past fall, when I went to the Farmer’s Market and I saw them on display. They looked good, and I asked what they were, and the man selling them actually gave me one to try. Strange, I never thought you could eat it raw, but it was actually quite good. And quite truthful to its name – it was sweet! So of course I added a bag of that to my usual veggies and I went home wondering how I was going to cook it. At first I thought I could just eat them raw, but then I really wanted to see how they taste cooked. So I looked up recipes and I was bombarded with different ways to cook them with rice and salads and more. It was really hard to decide. So I picked a simple stir-fry with oil, garlic, and lemon juice. I have to say, I finished about a pound of them that night. They were so good. Ever since then, I’ve been addicted to snap peas and I’ve been looking for other ways to cook them. I’ve noticed that many people blanch them, but for some reason whenever I hear the word ‘blanch’ I think of plain, boiled really not appetizing food. Don’t ask me where I got that idea. So a few days ago, I was at the East End Food Coop, and I saw that they were selling snap peas. I got so excited that I bought 3 pounds and rushed home, trying to find an interesting recipe I could use to blog about. And I found a few. But I decided on two of them – Bobby Flay’s Jasmine Rice Salad with Snap Peas Recipe and Ina Garten’s Sugar Snap Peas with sesame recipe.  As I said, I love to try new recipes so I was ecstatic when I found these two. Yet, when I was reading under how to prepare the dish in Ina Garten’s recipe, I found that it called for blanched snap peas! As I just mentioned, I really don’t like the idea of blanching the peas, so I decided to do a stir-fry. I really like how both recipes turned out, so I would definitely recommend them! 

Here’s what you need for my take on Ina Garten’s Sugar Snap Peas with Sesame recipe:
1 pound sugar snap peas
Sesame oil
Olive oil
Sesame seeds
 1 red bell pepper
½ an orange
½ a lemon
2 cloves garlic
Sea salt and freshly ground pepper to taste

Procedure: Rinse snap peas and take off the stem. If you’re not sure how to do this, click on this quick video --> http://www.youtube.com/watch?v=PBdqiNsB1no

Don't they look so pretty and bright? :-) I love snap peas

Take a wok (or any pan if you don’t have one) and coat the bottom with some olive oil. Mince the garlic and cook the garlic for about 1 minute before adding the snap peas. 


Let the peas stir fry for about 4-5 minutes, add some lemon rind and then add the sliced red peppers. Add the sesame seeds and begin to make the ‘dressing.’ 
I like to call it a dressing, but really all it is, is a citrus sauce for the snap peas. Squeeze the orange and lemon with 1 tsp of olive oil and 2 tsps sesame oil. Pour that into the wok and after a few seconds you can pour the snap peas into a dish and eat! 


This is a quick and simple dish that can be a snack a side dish or an hors d'oeuvre. And most importantly – it is delicious! 


Now to the slightly more complicated dish, yet still simple.

Bobby Flay’s Jasmine Rice Salad with Snap Peas:


(I used snap peas instead of snow peas and similar to what I did in the previous recipe, I stir fried them in another pan with the carrots and some extra garlic and olive oil)

First clean the snap peas. In a pan, cook the onions, garlic, cumin, nutmeg, coriander and ginger with the oil for about 1 or 2 minutes. (Don’t worry if they aren’t cooked all the way, it’s just to get the flavors out; we will be cooking them more later). 


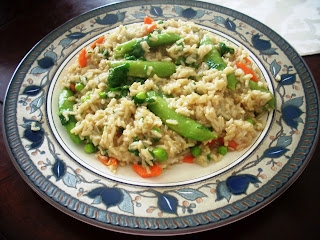
Now put the uncooked rice in, yes you heard me right, uncooked, and coat it with the spices and the oil. Then add 4 cups of water (not five like the recipe says, I used four, but if you don’t trust that then just use the amount it says on you bag of rice) into the pan and bring it to a boil. Once it has reached a boil, cover the pot and let it cook for however long it says on your package of rice. While the rice is cooking, stir fry the snap peas in a separate pan with the julienne carrot and another clove of garlic with some olive oil. Turn off the peas after they are done.  When the rice is done, add the snap peas into the pan, and mix in the chopped parsley. 


Stir well and serve. I really liked this dish because first of all it tasted wonderful (the spices really do make such a big difference) and it is a full meal. I will definitely make this again and I’m really excited to use other vegetables with this as well. 


It’s a great recipe and I hope you enjoy making it! I also hope after reading this blog you will buy and make some snap peas if you have never had them because they are amazing!

Sunday, February 19, 2012

Rich Chocolate Grain-Free Cookies


A friend of mine was reading this blog and suggested for me to try out a gluten-free or even grain-free recipe. I usually don’t eat that many grain-free foods, but I said, why not? I know a few people who can’t eat wheat, so they eat things with rice and such, but what about something without any grain. I was looking for new recipes so I started searching. So I was searching for something sweet, and I found these chocolate grain-free cookies that were called “Mudslide fudge cookies.” http://www.foodrenegade.com/grainfree-mudslide-fudge-cookies/

Much to my surprise, they actually looked really good. They looked like very flat chocolate cookies. And mudslide fudge cookies, that sounds good! Then I looked at the ingredients and I laughed. 5 ingredients, really? How is that even possible? No flour, no carbs, no sugar – what?!  This is every girl’s dream – chocolate cookies with no carbs, ha! When I saw that, I searched my pantry for those 5 ingredients (which I had) and made it. This recipe seriously takes 10 minutes, that’s it. And it wasn’t that bad.


Here’s what you need:
2/3 cup cocoa powder
3 egg whites (about 1/3 cup)
¼ cup of honey
¼ cup of dark chocolate chips or cut up bar
½ tsp. vanilla extract

 Procedure: Preheat oven to 350° F. Mix all of the ingredients together until smooth. 


Then make small dollops on a parchment lined cookie sheet. Make sure to leave spaces between them (it’s slightly liquidish so it will spread out).   


Bake the cookies for 8-10 minutes, until the cookies are set and the tops are shiny. Then let them sit for a minute or so (they are thin so they cool quickly) and remove from the cookie sheet. 


Now you can eat! First bite, I thought ‘Wow that’s rich!’ Yet, I have to say, it was almost a bit bitter. It’s a very intense bite of chocolate and maybe too much cocoa powder. I’m not sure if I measured wrong or maybe it’s just too much but overall I think the cookie wasn’t that bad. They taste better when they are warm, because they are sort of gooey and melt in your mouth. If you like chocolate, you will LOVE this. 


One suggestion I should make is to maybe use milk chocolate chips or maybe a little less cocoa powder, because after one cookie it’s almost too bitter. Or if you don’t want to change the recipe, you can eat it with a scoop of ice cream or some whip cream. Additionally, after the cookies cooled down, they weren’t too shiny or ‘glossy’ like they said on the website. So maybe, if I make this again, I might put a tablespoon of butter, just to give them a little shine. Otherwise, I thought it was pretty good for being grain-free, sugar-free, and carb free cookie. 


If you’re watching your weight or are allergic to grains, you should definitely try this. Also, it’s almost like an energy boost cookie because of all the caffeine, so if you have one of these in the morning you will definitely stay awake all day. And it’s much healthier than an energy drink. Try it and tell me your opinion! 

A Two in One Post: Eliopita and Tiropita


I decided to make two old traditional recipes of olive bread and cheese bread. This is the “χωριάτικο” style, or village style how they used to make them in the old days. In fact, many people still make it this way. Whenever I think of these breads, I remember my grandma in Cyprus. Every time anyone is coming over, she bakes them, makes some of the dark traditional (and mind you extremely bitter) Greek coffee and cuts fruit to serve to them. It’s the traditional food to serve when you are having guests over. I absolutely love them, especially when they are hot out of the oven – the whole house smells wonderful whenever she makes them. These breads are salty and moist, and perfect for really any occasion. And most importantly, they are extremely easy to make. I really wanted to make them, just to bring back some of the memories. I miss Cyprus and Greece since I haven’t gone in almost two years and I really miss spending time with all of my wonderful family. My family is truly a big fat Greek family, perfectly depicted in the My Big Fat Greek Wedding (maybe not as humiliating). I remember I would always help my grandma in the kitchen, we made homemade ravioli, these fried desserts called “daxtila” (ladies fingers), pastitsio (a Greek version of lasagna) and many many more recipes. A few times I helped her make the eliopita and tiropita and I loved it.


Ingredients (for the eliopita - olive bread):
Normal bread dough (you can make your own or buy some from the dairy case at your grocery store – a pizza dough would work)
1 medium onion
Around 2 cups of chopped kalamata olives
1 T dry mint (or fresh if you have that - fresh mint would probably be the better option)
Around 3 tablespoons sesame seeds (for the top)
 
Procedure: Preheat the oven to 350° F. Cut the dough into 5 sections and set two aside for the tiropita. Take the three and spread them out evenly. 


Mix the olives onions and mint together in a bowl. Then spoon on some of the mixture onto one side of the eliopita. 


Roll the dough until you reach the end then lightly slit the top diagonally with a sharp knife.


Continue this for the other two sections of dough. Then, take the sesame seeds, rinse them under warm water and pat them down on the top of the three rolls of dough. This will allow them to stick better and it will also help the crust to become crispier. 


Place the rolls on a baking tray and put them in the oven for about 30 minutes or until light brown. Now you’re done. You can slice the dough into small rolls and serve with some coffee or tea as an afternoon snack. Now it’s time for the tiropita.


Ingredients (for the tiropita):  
Dough (the other 2 sections of the dough that you cut for the eliopita)
About 2 lbs crumbled haloumi cheese (this is a goat cheese that you can find at any Greek store or Middle-eastern store) 
A handful of raisins (this really doesn’t matter, however many you like)
1 egg
About 1 T of dry mint (again, it’s better if you have fresh)
About 2 T of sesame seeds (on top)


Procedure: Take the other two sections of dough you cut and roll them out flat. Mix the haloumi cheese, the raisins, the egg, and the mint and spoon on some of it into the dough. 


Roll it until you reach the end and slit the top diagonally in small slits with a sharp knife. Take the rest of the sesame seeds and pat them on top of the rolls. 


Do the same for the second roll. Place the tiropites into the oven for about 30 minutes and then slice. Here are all of the tiropita and eliopita together.  
 

I hope you try these two recipes out and tell me which you like best! I personally think I like the tiropita better, because it has the salty cheese with the sweet raisins. But I also love the eliopites. Enjoy!